Quantcast
Channel: The Crazy Programmer
Viewing all 761 articles
Browse latest View live

PL/SQL Program for Reverse of a Number

$
0
0

Here you will get pl/sql program for reverse of a number.

For example:

Number = 34589

Reverse of number = 98543


PL/SQL Program for Reverse of a Number

declare
	n number;
	i number;
	rev number:=0;
	r number;

begin
	n:=&n;
	
	while n>0
	loop
		r:=mod(n,10);
		rev:=(rev*10)+r;
		n:=trunc(n/10);
	end loop;

	dbms_output.put_line('reverse is '||rev);

end;
/


Output

Enter value for n: 4578
old 8: n:=&n;
new 8: n:=4578;
reverse is 8754

The post PL/SQL Program for Reverse of a Number appeared first on The Crazy Programmer.


PL/SQL Program for Fibonacci Series

$
0
0

Here you will get pl/sql program for fibonacci series.

It is a series in which next number is the sum of previous two numbers.


PL/SQL Program for Fibonacci Series

declare
	first number:=0;
	second number:=1;
	third number;
	n number:=&n;
	i number;

begin
	dbms_output.put_line('Fibonacci series is:');
	dbms_output.put_line(first);
	dbms_output.put_line(second);	

	for i in 2..n
	loop
		third:=first+second;
		first:=second;
		second:=third;
		dbms_output.put_line(third);
	end loop;
end;
/


Output

Enter value for n: 6
old 5: n number:=&n;
new 5: n number:=6;
Fibonacci series is:
0
1
1
2
3
5
8

The post PL/SQL Program for Fibonacci Series appeared first on The Crazy Programmer.

PL/SQL Program to Check Number is Odd or Even

$
0
0

Here you will get pl/sql program to check number is odd or even.

A number is even if it is completely divisible by 2 otherwise it is odd.


PL/SQL Program to Check Number is Odd or Even

declare
	n number:=&n;

begin
	if mod(n,2)=0
	then
		dbms_output.put_line('number is even');
	else
		dbms_output.put_line('number is odd');
	end if;
end;
/


Output

Enter value for n: 7
old   2:        n number:=&n;
new   2:        n number:=7;
number is odd

The post PL/SQL Program to Check Number is Odd or Even appeared first on The Crazy Programmer.

PL/SQL Program to Reverse a String

$
0
0

Here you will get pl/sql program to reverse a string.

The substr() function returns a part of string. It has following syntax.

substr(string, position, length);

We will use this function to extract character by character from string in reverse order and concatenate it previous extracted character. || is used to concatenate string.

In this way string is reversed.


PL/SQL Program to Reverse a String

declare
	str1 varchar2(50):='&str';
	str2 varchar2(50);
	len number;
	i number;

begin
	len:=length(str1);
	
	for i in reverse 1..len
	loop
		str2:=str2 || substr(str1,i,1);
	end loop;
	
	dbms_output.put_line('Reverse of String is:'||str2);
end;
/


Output

Enter value for str: hello world
old 2: str1 varchar2(50):=’&str’;
new 2: str1 varchar2(50):=’hello world’;
Reverse of String is:dlrow olleh

The post PL/SQL Program to Reverse a String appeared first on The Crazy Programmer.

Android Restful Web Service Client Example

$
0
0

In this tutorial you learn how to create an android restful web service client to consume a restful web service developed in Java.

Before making the android client make sure the web service is already running on server. I am using apache tomcat server to run the java web service in my local system.

If you don’t know how to make Java restful web service then read below tutorial.

Also Read: Create Simple Java RESTful Web Services Using Jersey

In this example the android client will send some string to server which is reversed and sent back to the android client.


Android Restful Web Service Client Example

1. Create a new android project with package name com.androidrestfullwebservice

2. I am using Volley library to load data from server. If you don’t know how to use this library then read below tutorial.

Also Read: Android Volley Tutorial With Example

3. Just copy and paste below line in build.gradle (Module) file to add dependency for Volley library. After adding Sync the project.

compile 'com.android.volley:volley:1.0.0'


4. As we are doing network related work so add internet access permission in AndroidMainifest.xml file by adding following line.

<uses-permission android:name="android.permission.INTERNET"/>


5. Create an activity and add following code in respective files.

activity_main.xml

<?xml version="1.0" encoding="utf-8"?>
<LinearLayout xmlns:android="http://schemas.android.com/apk/res/android"
    xmlns:tools="http://schemas.android.com/tools"
    android:layout_width="match_parent"
    android:layout_height="match_parent"
    android:paddingBottom="@dimen/activity_vertical_margin"
    android:paddingLeft="@dimen/activity_horizontal_margin"
    android:paddingRight="@dimen/activity_horizontal_margin"
    android:paddingTop="@dimen/activity_vertical_margin"
    tools:context="com.androidrestfullwebservice.MainActivity"
    android:orientation="vertical">

    <EditText
        android:layout_width="match_parent"
        android:layout_height="wrap_content"
        android:id="@+id/editText"/>

    <Button
        android:layout_width="match_parent"
        android:layout_height="wrap_content"
        android:text="Fetch"
        android:id="@+id/btn"/>

    <TextView
        android:layout_width="match_parent"
        android:layout_height="wrap_content"
        android:id="@+id/text"/>
</LinearLayout>


MainActivity.java

package com.androidrestfullwebservice;

import android.support.v7.app.AppCompatActivity;
import android.os.Bundle;
import android.view.View;
import android.widget.Button;
import android.widget.EditText;
import android.widget.TextView;

import com.android.volley.Request;
import com.android.volley.RequestQueue;
import com.android.volley.Response;
import com.android.volley.VolleyError;
import com.android.volley.toolbox.StringRequest;
import com.android.volley.toolbox.Volley;

public class MainActivity extends AppCompatActivity {
    EditText editText;
    TextView text;
    Button btn;
    String url ="http://192.168.1.3/JavaRESTfullWS/rest/DemoService/";

    @Override
    protected void onCreate(Bundle savedInstanceState) {
        super.onCreate(savedInstanceState);
        setContentView(R.layout.activity_main);

        editText = (EditText)findViewById(R.id.editText);
        text = (TextView)findViewById(R.id.text);
        btn = (Button)findViewById(R.id.btn);

        btn.setOnClickListener(new View.OnClickListener() {
            @Override
            public void onClick(View v) {
                StringRequest request = new StringRequest(Request.Method.GET, url+editText.getText().toString(), new Response.Listener<String>(){
                    @Override
                    public void onResponse(String s) {
                        text.setText(s);
                    }
                },new Response.ErrorListener(){
                    @Override
                    public void onErrorResponse(VolleyError volleyError) {
                        text.setText("Some error occurred!!");
                    }
                });

                RequestQueue rQueue = Volley.newRequestQueue(MainActivity.this);
                rQueue.add(request);
            }
        });
    }
}


6. Now run the project.


Screenshot

Android Restful Web Service Client Example

Comment below if you are facing any difficulty to make android restful web service client.

The post Android Restful Web Service Client Example appeared first on The Crazy Programmer.

Android Login and Register Using Restful Web Services (Java + MySQL)

$
0
0

Here you will learn to make android login and register system using restful web services in java and mysql.

In this tutorial I will teach you to develop a very simple android app for login and register system. This system sends the login or register request to the restful web service that is running on local server.

If you don’t know how to make restful web services in java and use it in android then I would highly recommend you to first read below tutorials.

Also Read: Create Simple Java RESTful Web Services Using Jersey

Also Read: Android Restful Web Service Client Example

Android Login and Register Using Restful Web Services (Java + MySQL)

Android Login and Register Using Restful Web Services (Java + MySQL)

Create Restful Web Service

I have used MySQL database in this web service. Make a login table in database with following schema.

mysql database login schema


Below is the code for restful web service developed in Java.

DemoService.java

package example;

import java.sql.Connection;
import java.sql.DriverManager;
import java.sql.PreparedStatement;
import java.sql.ResultSet;

import javax.ws.rs.Consumes;
import javax.ws.rs.FormParam;
import javax.ws.rs.POST;
import javax.ws.rs.Path;
import javax.ws.rs.Produces;
import javax.ws.rs.core.MediaType;

@Path("/DemoService")
public class DemoService {
	final static String url = "jdbc:mysql://localhost:3306/test";
	final static String user = "root";
	final static String pass = "root";

	@POST
	@Path("/login")
	@Consumes(MediaType.APPLICATION_FORM_URLENCODED)
	@Produces(MediaType.TEXT_HTML)
	public String login(@FormParam("email") String email, @FormParam("password") String password){
		String result="false";
		
		try{
			Class.forName("com.mysql.jdbc.Driver");
			Connection con = DriverManager.getConnection(url, user, pass);
			
			PreparedStatement ps = con.prepareStatement("select * from login where email=? and password=?");
			ps.setString(1, email);
			ps.setString(2, password);
			
			ResultSet rs = ps.executeQuery();
			
			if(rs.next()){
				result = "true";
			}
			
			con.close();
		}
		catch(Exception e){
			e.printStackTrace();
		}
		
		return result;
	}

	@POST
	@Path("/register")
	@Consumes(MediaType.APPLICATION_FORM_URLENCODED)
	@Produces(MediaType.TEXT_HTML)
	public String register(@FormParam("email") String email, @FormParam("password") String password){
		String result="false";
		int x = 0;
		
		try{
			Class.forName("com.mysql.jdbc.Driver");
			Connection con = DriverManager.getConnection(url, user, pass);
						
			PreparedStatement ps = con.prepareStatement("insert into login(email, password) values(?,?)");
			ps.setString(1, email);
			ps.setString(2, password);
			
			x = ps.executeUpdate();
			
			if(x==1){
				result = "true";
			}
			
			con.close();
		}
		catch(Exception e){
			e.printStackTrace();
		}
		
		return result;
	}
}


Create Android Project

Make a new android project with package name com.loginandregister

For sending and fetching data from server I am using Volley library. So add its dependency in build.gradle file.

compile 'com.android.volley:volley:1.0.0'


Read below tutorial if you don’t know how to use volley library.

Also Read: Android Volley Tutorial With Example


As we are doing network related operation so add internet access permission in AndroidManifest.xml file.

<uses-permission android:name="android.permission.INTERNET"/>


Now create three activities in the project Login, Register and Home. Add following code in the respective files.

Login.java

package com.loginandregister;

import android.content.Intent;
import android.support.v7.app.AppCompatActivity;
import android.os.Bundle;
import android.view.View;
import android.widget.Button;
import android.widget.EditText;
import android.widget.TextView;
import android.widget.Toast;

import com.android.volley.AuthFailureError;
import com.android.volley.Request;
import com.android.volley.RequestQueue;
import com.android.volley.Response;
import com.android.volley.VolleyError;
import com.android.volley.toolbox.StringRequest;
import com.android.volley.toolbox.Volley;

import java.util.HashMap;
import java.util.Map;

public class Login extends AppCompatActivity {
    EditText emailBox, passwordBox;
    Button loginButton;
    TextView registerLink;
    String URL = "http://192.168.1.8/JavaRESTfullWS/DemoService/login";

    @Override
    protected void onCreate(Bundle savedInstanceState) {
        super.onCreate(savedInstanceState);
        setContentView(R.layout.activity_login);

        emailBox = (EditText)findViewById(R.id.emailBox);
        passwordBox = (EditText)findViewById(R.id.passwordBox);
        loginButton = (Button)findViewById(R.id.loginButton);
        registerLink = (TextView)findViewById(R.id.registerLink);

        loginButton.setOnClickListener(new View.OnClickListener() {
            @Override
            public void onClick(View v) {
                StringRequest request = new StringRequest(Request.Method.POST, URL, new Response.Listener<String>(){
                    @Override
                    public void onResponse(String s) {
                        if(s.equals("true")){
                            Toast.makeText(Login.this, "Login Successful", Toast.LENGTH_LONG).show();
                            startActivity(new Intent(Login.this,Home.class));
                        }
                        else{
                            Toast.makeText(Login.this, "Incorrect Details", Toast.LENGTH_LONG).show();
                        }
                    }
                },new Response.ErrorListener(){
                    @Override
                    public void onErrorResponse(VolleyError volleyError) {
                        Toast.makeText(Login.this, "Some error occurred -> "+volleyError, Toast.LENGTH_LONG).show();;
                    }
                }) {
                    @Override
                    protected Map<String, String> getParams() throws AuthFailureError {
                        Map<String, String> parameters = new HashMap<String, String>();
                        parameters.put("email", emailBox.getText().toString());
                        parameters.put("password", passwordBox.getText().toString());
                        return parameters;
                    }
                };

                RequestQueue rQueue = Volley.newRequestQueue(Login.this);
                rQueue.add(request);
            }
        });

        registerLink.setOnClickListener(new View.OnClickListener() {
            @Override
            public void onClick(View v) {
                startActivity(new Intent(Login.this, Register.class));
            }
        });
    }
}


activity_login.xml

<?xml version="1.0" encoding="utf-8"?>
<LinearLayout xmlns:android="http://schemas.android.com/apk/res/android"
    xmlns:tools="http://schemas.android.com/tools"
    android:layout_width="match_parent"
    android:layout_height="match_parent"
    android:paddingBottom="20dp"
    android:paddingLeft="20dp"
    android:paddingRight="20dp"
    android:paddingTop="20dp"
    tools:context="com.loginandregister.Login"
    android:orientation="vertical"
    android:gravity="center">

    <EditText
        android:layout_width="match_parent"
        android:layout_height="wrap_content"
        android:hint="Email"
        android:id="@+id/emailBox"/>

    <EditText
        android:layout_width="match_parent"
        android:layout_height="wrap_content"
        android:hint="Password"
        android:id="@+id/passwordBox"
        android:layout_marginTop="10dp"/>

    <Button
        android:layout_width="match_parent"
        android:layout_height="wrap_content"
        android:text="Login"
        android:id="@+id/loginButton"
        android:layout_marginTop="10dp"/>

    <TextView
        android:layout_width="match_parent"
        android:layout_height="wrap_content"
        android:text="Click here to register"
        android:textSize="20dp"
        android:layout_marginTop="15dp"
        android:gravity="center"
        android:id="@+id/registerLink"
        android:textColor="#0D47A1"/>
</LinearLayout>


Register.java

package com.loginandregister;

import android.content.Intent;
import android.support.v7.app.AppCompatActivity;
import android.os.Bundle;
import android.view.View;
import android.widget.Button;
import android.widget.EditText;
import android.widget.TextView;
import android.widget.Toast;

import com.android.volley.AuthFailureError;
import com.android.volley.Request;
import com.android.volley.RequestQueue;
import com.android.volley.Response;
import com.android.volley.VolleyError;
import com.android.volley.toolbox.StringRequest;
import com.android.volley.toolbox.Volley;

import java.util.HashMap;
import java.util.Map;

public class Register extends AppCompatActivity {
    EditText emailBox, passwordBox;
    Button registerButton;
    TextView loginLink;
    String URL = "http://192.168.1.8/JavaRESTfullWS/DemoService/register";

    @Override
    protected void onCreate(Bundle savedInstanceState) {
        super.onCreate(savedInstanceState);
        setContentView(R.layout.activity_register);

        emailBox = (EditText)findViewById(R.id.emailBox);
        passwordBox = (EditText)findViewById(R.id.passwordBox);
        registerButton = (Button)findViewById(R.id.registerButton);
        loginLink = (TextView)findViewById(R.id.loginLink);

        registerButton.setOnClickListener(new View.OnClickListener() {
            @Override
            public void onClick(View v) {
                StringRequest request = new StringRequest(Request.Method.POST, URL, new Response.Listener<String>(){
                    @Override
                    public void onResponse(String s) {
                        if(s.equals("true")){
                            Toast.makeText(Register.this, "Registration Successful", Toast.LENGTH_LONG).show();
                        }
                        else{
                            Toast.makeText(Register.this, "Can't Register", Toast.LENGTH_LONG).show();
                        }
                    }
                },new Response.ErrorListener(){
                    @Override
                    public void onErrorResponse(VolleyError volleyError) {
                        Toast.makeText(Register.this, "Some error occurred -> "+volleyError, Toast.LENGTH_LONG).show();;
                    }
                }) {
                    @Override
                    protected Map<String, String> getParams() throws AuthFailureError {
                        Map<String, String> parameters = new HashMap<String, String>();
                        parameters.put("email", emailBox.getText().toString());
                        parameters.put("password", passwordBox.getText().toString());
                        return parameters;
                    }
                };

                RequestQueue rQueue = Volley.newRequestQueue(Register.this);
                rQueue.add(request);
            }
        });

        loginLink.setOnClickListener(new View.OnClickListener() {
            @Override
            public void onClick(View v) {
                startActivity(new Intent(Register.this, Login.class));
            }
        });
    }
}


activity_register.xml

<?xml version="1.0" encoding="utf-8"?>
<LinearLayout xmlns:android="http://schemas.android.com/apk/res/android"
    xmlns:tools="http://schemas.android.com/tools"
    android:layout_width="match_parent"
    android:layout_height="match_parent"
    android:paddingBottom="@dimen/activity_vertical_margin"
    android:paddingLeft="@dimen/activity_horizontal_margin"
    android:paddingRight="@dimen/activity_horizontal_margin"
    android:paddingTop="@dimen/activity_vertical_margin"
    tools:context="com.loginandregister.Register"
    android:orientation="vertical"
    android:gravity="center">

    <EditText
        android:layout_width="match_parent"
        android:layout_height="wrap_content"
        android:hint="Email"
        android:id="@+id/emailBox"/>

    <EditText
        android:layout_width="match_parent"
        android:layout_height="wrap_content"
        android:hint="Password"
        android:id="@+id/passwordBox"
        android:layout_marginTop="10dp"/>

    <Button
        android:layout_width="match_parent"
        android:layout_height="wrap_content"
        android:text="Register"
        android:id="@+id/registerButton"
        android:layout_marginTop="10dp"/>

    <TextView
        android:layout_width="match_parent"
        android:layout_height="wrap_content"
        android:text="Click here to login"
        android:textSize="20dp"
        android:layout_marginTop="15dp"
        android:gravity="center"
        android:id="@+id/loginLink"
        android:textColor="#0D47A1"/>
</LinearLayout>


Home.java

package com.loginandregister;

import android.support.v7.app.AppCompatActivity;
import android.os.Bundle;

public class Home extends AppCompatActivity {

    @Override
    protected void onCreate(Bundle savedInstanceState) {
        super.onCreate(savedInstanceState);
        setContentView(R.layout.activity_home);
    }
}


activity_home.xml

<?xml version="1.0" encoding="utf-8"?>
<LinearLayout xmlns:android="http://schemas.android.com/apk/res/android"
    xmlns:tools="http://schemas.android.com/tools"
    android:layout_width="match_parent"
    android:layout_height="match_parent"
    android:paddingBottom="20dp"
    android:paddingLeft="20dp"
    android:paddingRight="20dp"
    android:paddingTop="20dp"
    tools:context="com.loginandregister.Home"
    android:gravity="center">

    <TextView
        android:layout_width="match_parent"
        android:layout_height="wrap_content"
        android:text="- Welcome -"
        android:textSize="30dp"
        android:gravity="center"/>
</LinearLayout>


Make sure the web service is already running on the server. Also change the IP 192.168.1.8 in the URL with the IPv4 of your local system. You can find the IPv4 in windows by typing ipconfig command in command prompt.

Finally run and test the project.


Screenshots

login

register

home


The whole code is very simple and self-explanatory. If still you are facing any problem then feel free to ask in comment section.

The post Android Login and Register Using Restful Web Services (Java + MySQL) appeared first on The Crazy Programmer.

Android Upload Image to Server Using Volley

$
0
0

Here you will learn about android upload image to server using volley library.

At server side I have used java web service and for sending image to server volley library is used.

How it works?

  • The user chooses an image from gallery and click on upload button.
  • The image is then converted into Base64 string format and sent to server using volley network library.
  • Now at server side this Bas64 string is converted back into image and stored at some location.


Android Upload Image to Server Using Volley

Server Code

Below is the code for server. It is a java web service. If you don’t know how to make web service in java then read below tutorial.

Also Read: Create Simple Java RESTful Web Services Using Jersey

DemoService.java

package example;

import java.io.FileOutputStream;
import javax.ws.rs.Consumes;
import javax.ws.rs.FormParam;
import javax.ws.rs.POST;
import javax.ws.rs.Path;
import javax.ws.rs.Produces;
import javax.ws.rs.core.MediaType;

import org.apache.commons.codec.binary.Base64;

@Path("/DemoService")
public class DemoService {
	@POST
	@Path("/upload")
	@Consumes(MediaType.APPLICATION_FORM_URLENCODED)
	@Produces(MediaType.TEXT_HTML)
	public String uploadImage(@FormParam("image") String image) {
		String result="false";
		
		//decode Base64 String to image
		try{
			FileOutputStream fos = new FileOutputStream("H:/image.jpg"); //change the path where you want to save the image
			byte byteArray[] = Base64.decodeBase64(image);
			fos.write(byteArray);
			 
			result="true";
			fos.close();		
		}
		catch(Exception e){
			e.printStackTrace();
		}
		
		return result;
	}
}


Android Project

1. Now create a new android project with package name com.androiduploadimage


2. Add dependency for volley library by adding following line in build.gradle file.

compile 'com.android.volley:volley:1.0.0'


3. Add internet access permission in AndroidManifest.xml file.

<uses-permission android:name="android.permission.INTERNET"/>


4. Add following code in respective files.

activity_main.xml

<?xml version="1.0" encoding="utf-8"?>
<LinearLayout xmlns:android="http://schemas.android.com/apk/res/android"
    xmlns:tools="http://schemas.android.com/tools"
    android:layout_width="match_parent"
    android:layout_height="match_parent"
    android:paddingBottom="15dp"
    android:paddingLeft="15dp"
    android:paddingRight="15dp"
    android:paddingTop="15dp"
    tools:context="com.androiduploadimage.MainActivity"
    android:orientation="vertical">

    <ImageView
        android:layout_width="match_parent"
        android:layout_height="200dp"
        android:id="@+id/image"/>

    <Button
        android:layout_width="match_parent"
        android:layout_height="wrap_content"
        android:text="Choose"
        android:id="@+id/choose"/>

    <Button
        android:layout_width="match_parent"
        android:layout_height="wrap_content"
        android:text="Upload"
        android:id="@+id/upload"/>

</LinearLayout>


MainActivity.java

package com.androiduploadimage;

import android.app.ProgressDialog;
import android.content.Intent;
import android.graphics.Bitmap;
import android.net.Uri;
import android.provider.MediaStore;
import android.support.v7.app.AppCompatActivity;
import android.os.Bundle;
import android.util.Base64;
import android.view.View;
import android.widget.Button;
import android.widget.ImageView;
import android.widget.Toast;

import com.android.volley.AuthFailureError;
import com.android.volley.Request;
import com.android.volley.RequestQueue;
import com.android.volley.Response;
import com.android.volley.VolleyError;
import com.android.volley.toolbox.StringRequest;
import com.android.volley.toolbox.Volley;

import java.io.ByteArrayOutputStream;
import java.util.HashMap;
import java.util.Map;

public class MainActivity extends AppCompatActivity {
    ImageView image;
    Button choose, upload;
    int PICK_IMAGE_REQUEST = 111;
    String URL ="http://192.168.1.101/JavaRESTfullWS/DemoService/upload";
    Bitmap bitmap;
    ProgressDialog progressDialog;

    @Override
    protected void onCreate(Bundle savedInstanceState) {
        super.onCreate(savedInstanceState);
        setContentView(R.layout.activity_main);

        image = (ImageView)findViewById(R.id.image);
        choose = (Button)findViewById(R.id.choose);
        upload = (Button)findViewById(R.id.upload);

        //opening image chooser option
        choose.setOnClickListener(new View.OnClickListener() {
            @Override
            public void onClick(View v) {
                Intent intent = new Intent();
                intent.setType("image/*");
                intent.setAction(Intent.ACTION_PICK);
                startActivityForResult(Intent.createChooser(intent, "Select Image"), PICK_IMAGE_REQUEST);
            }
        });

        upload.setOnClickListener(new View.OnClickListener() {
            @Override
            public void onClick(View v) {
                progressDialog = new ProgressDialog(MainActivity.this);
                progressDialog.setMessage("Uploading, please wait...");
                progressDialog.show();

                //converting image to base64 string
                ByteArrayOutputStream baos = new ByteArrayOutputStream();
                bitmap.compress(Bitmap.CompressFormat.JPEG, 100, baos);
                byte[] imageBytes = baos.toByteArray();
                final String imageString = Base64.encodeToString(imageBytes, Base64.DEFAULT);

                //sending image to server
                StringRequest request = new StringRequest(Request.Method.POST, URL, new Response.Listener<String>(){
                    @Override
                    public void onResponse(String s) {
                        progressDialog.dismiss();
                        if(s.equals("true")){
                            Toast.makeText(MainActivity.this, "Uploaded Successful", Toast.LENGTH_LONG).show();
                        }
                        else{
                            Toast.makeText(MainActivity.this, "Some error occurred!", Toast.LENGTH_LONG).show();
                        }
                    }
                },new Response.ErrorListener(){
                    @Override
                    public void onErrorResponse(VolleyError volleyError) {
                        Toast.makeText(MainActivity.this, "Some error occurred -> "+volleyError, Toast.LENGTH_LONG).show();;
                    }
                }) {
                    //adding parameters to send
                    @Override
                    protected Map<String, String> getParams() throws AuthFailureError {
                        Map<String, String> parameters = new HashMap<String, String>();
                        parameters.put("image", imageString);
                        return parameters;
                    }
                };

                RequestQueue rQueue = Volley.newRequestQueue(MainActivity.this);
                rQueue.add(request);
            }
        });
    }

    @Override
    protected void onActivityResult(int requestCode, int resultCode, Intent data) {
        super.onActivityResult(requestCode, resultCode, data);

        if (requestCode == PICK_IMAGE_REQUEST && resultCode == RESULT_OK && data != null && data.getData() != null) {
            Uri filePath = data.getData();

            try {
                //getting image from gallery
                bitmap = MediaStore.Images.Media.getBitmap(getContentResolver(), filePath);

                //Setting image to ImageView
                image.setImageBitmap(bitmap);
            } catch (Exception e) {
                e.printStackTrace();
            }
        }
    }
}


Screenshot

Android Upload Image to Server Using Volley

You can ask your queries in comment section.

The post Android Upload Image to Server Using Volley appeared first on The Crazy Programmer.

Program for Shell Sort in C and C++

$
0
0

Here you will get program for shell sort in C and C++.

Shell short is an improved and efficient version of insertion sort.

In this algorithm we sort the pair of elements that are far apart by gap h. The process is repeated by reducing h until it becomes 1.

Program for Shell Sort in C and C++

Program for Shell Sort in C

#include<stdio.h>

void sort(int a[],int n)
{
	int gap,i,j,temp;
	for(gap=n/2;gap>0;gap/=2)
	{
		for(i=gap;i<n;i+=1)
		{
			temp=a[i];
			
			for(j=i;j>=gap&&a[j-gap]>temp;j-=gap)
				a[j]=a[j-gap];
			
			a[j]=temp;
		}
	}
}

int main()
{
	int a[20],i,n;
	
	printf("Enter number of elements:");
	scanf("%d",&n);
		
	printf("Enter array elements:\n");
	for(i=0;i<n;++i)
		scanf("%d",&a[i]);

	sort(a,n);

	printf("\nArray after shell sort:\n");
	for(i=0;i<n;++i)
		printf("%d ",a[i]);

    return 0;
}


Program for Shell Sort in C++

#include<iostream>

using namespace std;

void sort(int a[],int n)
{
	int gap,i,j,temp;

	for(gap=n/2;gap>0;gap/=2)
	{
		for(i=gap;i<n;i+=1)
		{
			temp=a[i];
			for(j=i;j>=gap&&a[j-gap]>temp;j-=gap)
				a[j]=a[j-gap];
			
			a[j]=temp;
		}
    }
}

int main()
{
	int a[20],i,n;
	
	cout<<"Enter number of elements:";
	cin>>n;
		
	cout<<"Enter array elements:\n";
	for(i=0;i<n;++i)
		cin>>a[i];

	sort(a,n);

	cout<<"\nArray after shell sort:\n";
	for(i=0;i<n;++i)
		cout<<a[i]<<" ";

    return 0;
}


Output

Enter number of elements:5
Enter array elements:
56 7 2 9 12

Array after shell sort:
2 7 9 12 56


You can watch below video to learn more about shell sort.

The post Program for Shell Sort in C and C++ appeared first on The Crazy Programmer.


Producer Consumer Problem in C

$
0
0

Here you will learn about producer consumer problem in C.

Producer consumer problem is also known as bounded buffer problem. In this problem we have two processes, producer and consumer, who share a fixed size buffer. Producer work is to produce data or items and put in buffer. Consumer work is to remove data from buffer and consume it. We have to make sure that producer do not produce data when buffer is full and consumer do not remove data when buffer is empty.

Also Read: Banker’s Algorithm in C

The producer should go to sleep when buffer is full. Next time when consumer removes data it notifies the producer and producer starts producing data again. The consumer should go to sleep when buffer is empty. Next time when producer add data it notifies the consumer and consumer starts consuming data. This solution can be achieved using semaphores.

producer consumer problem in c

Image Source

Below is the program to implement this problem.

Producer Consumer Problem in C

#include<stdio.h>

int mutex=1,full=0,empty=3,x=0;

int main()
{
	int n;
	void producer();
	void consumer();
	int wait(int);
	int signal(int);
	printf("\n1.Producer\n2.Consumer\n3.Exit");
	while(1)
	{
		printf("\nEnter your choice:");
		scanf("%d",&n);
		switch(n)
		{
			case 1:	if((mutex==1)&&(empty!=0))
						producer();
					else
						printf("Buffer is full!!");
					break;
			case 2:	if((mutex==1)&&(full!=0))
						consumer();
					else
						printf("Buffer is empty!!");
					break;
			case 3:
					exit(0);
					break;
		}
	}
	
	return 0;
}

int wait(int s)
{
	return (--s);
}

int signal(int s)
{
	return(++s);
}

void producer()
{
	mutex=wait(mutex);
	full=signal(full);
	empty=wait(empty);
	x++;
	printf("\nProducer produces the item %d",x);
	mutex=signal(mutex);
}

void consumer()
{
	mutex=wait(mutex);
	full=wait(full);
	empty=signal(empty);
	printf("\nConsumer consumes item %d",x);
	x--;
	mutex=signal(mutex);
}


Output

1.Producer
2.Consumer
3.Exit
Enter your choice:1

Producer produces the item 1
Enter your choice:2

Consumer consumes item 1
Enter your choice:2
Buffer is empty!!
Enter your choice:1

Producer produces the item 1
Enter your choice:1

Producer produces the item 2
Enter your choice:1

Producer produces the item 3
Enter your choice:1
Buffer is full!!
Enter your choice:3

The post Producer Consumer Problem in C appeared first on The Crazy Programmer.

Difference between SQL and PL/SQL

$
0
0

Here you will learn about difference between SQL and PL/SQL.

SQL and PL/SQL are two popular database technologies. These two topics are very frequently asked in database interviews.

In this article I have shared the key differences between these two technologies.

Also Read: PL/SQL Interview Questions and Answers

Difference between SQL and PL/SQL

Image Source

Difference between SQL and PL/SQL

S. No. SQL PL/SQL
1. SQL Stands for Structured Query Language PL/SQL stands for Programming Language SQL.
2. SQL is used to execute single query or statement at a time. PL/SQL is used to execute block of code or program that have multiple statements.
3. SQL tells the database what to do but not how to do. So it is declarative. PL/SQL tells the database how to do things. So it is procedural.
4. SQL can be used in PL/SQL programs. PL/SQL can’t be used in SQL statement.
5. SQL is used with various database systems like MySQL, SQL Server, Oracle, DB2, etc. PL/SQL is used only with Oracle database.
6. An example of SQL query is given below.

SELECT * FROM Customers;

An example of PL/SQL program is given below.

BEGIN 

dbms_output.put_line(‘Hello Workd’);

END;

/


Comment below if you found any information incorrect or missing.

The post Difference between SQL and PL/SQL appeared first on The Crazy Programmer.

0-1 Knapsack Problem in C Using Dynamic Programming

$
0
0

Here you will learn about 0-1 knapsack problem in C.

We are given n items with some weights and corresponding values and a knapsack of capacity W. The items should be placed in the knapsack in such a way that the total value is maximum and total weight should be less than knapsack capacity.

In this problem 0-1 means that we can’t put the items in fraction. Either put the complete item or ignore it. Below is the solution for this problem in C using dynamic programming.

Knapsack Problem in C Using Dynamic Programming
Program for Knapsack Problem in C Using Dynamic Programming

#include<stdio.h>
 
int max(int a, int b) { return (a > b)? a : b; }
 
int knapSack(int W, int wt[], int val[], int n)
{
   int i, w;
   int K[n+1][W+1];
 
   for (i = 0; i <= n; i++)
   {
       for (w = 0; w <= W; w++)
       {
           if (i==0 || w==0)
               K[i][w] = 0;
           else if (wt[i-1] <= w)
                 K[i][w] = max(val[i-1] + K[i-1][w-wt[i-1]],  K[i-1][w]);
           else
                 K[i][w] = K[i-1][w];
       }
   }
 
   return K[n][W];
}
 
int main()
{
    int i, n, val[20], wt[20], W;
    
    printf("Enter number of items:");
    scanf("%d", &n);
    
    printf("Enter value and weight of items:\n");
    for(i = 0;i < n; ++i){
    	scanf("%d%d", &val[i], &wt[i]);
    }

    printf("Enter size of knapsack:");
    scanf("%d", &W);
    
    printf("%d", knapSack(W, wt, val, n));
    return 0;
}


Output

Enter number of items:3
Enter value and weight of items:
100 20
50 10
150 30
Enter size of knapsack:50
250


You can watch below video to learn knapsack problem easily.

Source: http://www.geeksforgeeks.org/dynamic-programming-set-10-0-1-knapsack-problem/

The post 0-1 Knapsack Problem in C Using Dynamic Programming appeared first on The Crazy Programmer.

Format Specifiers in C

$
0
0

In this article you will get list of format specifiers in C.

Format specifier is used to specify the data type while reading or writing. For example if you want to print value of an integer type variable then you have to use %d in printf() function. Take below example.

#include<stdio.h>

int main(){
	int a;
	scanf("%d", &a);
	printf("%d", a);
	
	return 0;
}


As you can see that I have used %d while reading and printing integer value.

C language has various format specifiers that I have listed below.


List of Format Specifiers in C

Data Type Format Specifier
char %c
signed char %c (or %hhi for numerical output)
unsigned char %c (or %hhu for numerical output)
short
short int
signed short
signed short int
%hi
unsigned short

unsigned short int

%hu
int

signed

signed int

%i or %d
unsigned

unsigned int

%u
long

long int

signed long

signed long int

%li
unsigned long

unsigned long int

%lu
long long

long long int

signed long long

signed long long int

%lli
unsigned long long

unsigned long long int

%llu
float %f (promoted automatically to double for printf())
double %f (%F)

(%lf (%lF) for scanf())

%g  %G

%e  %E (for scientific notation)

long double %Lf  %LF

%Lg  %LG

%Le  %LE


Comment below if you found anything incorrect or missing in above list of format specifiers in C.

Source: https://en.wikipedia.org/wiki/C_data_types

The post Format Specifiers in C appeared first on The Crazy Programmer.

Android Push Notification Using Firebase Cloud Messaging (FCM)

$
0
0

In this tutorial you will learn to implement android push notification using firebase cloud messaging (FCM).

Firebase is a real time cross platform database that provides various functionalities like authentication, storage, notification, etc. Firebase is becoming popular among developers due to its simplicity and easy implementation. In earlier days Google Cloud Messaging (GCM) was used to implement push notification. But Firebase Cloud Messaging (FCM) is better and easy to implement than GCM.

Android Push Notification Using Firebase Cloud Messaging (FCM)

Android Push Notification Using Firebase Cloud Messaging (FCM)

Prerequisites

To use FCM there are few minimum requirements.

  • Device with Android 2.3 or newer and Google Play services 9.6.0 or newer
  • The Google Repository from the Android SDK Manager
  • Android Studio 1.5 or higher version.


Android Project

Create a new android studio project with package name com.pushnotificationexample and copy the package name.


Firebase Project

Go to Firebase console https://firebase.google.com/console/ to create a new project.

Click on Create New Project button. Enter some project name and your country. Click on Create Project button to create the firebase project.

Android Push Notification Using Firebase Cloud Messaging (FCM)

Choose Add Firebase to your Android app option.

Android Push Notification Using Firebase Cloud Messaging (FCM)

Enter the package name that you copied earlier and click Add App button. You will get a google-services.json file.

Android Push Notification Using Firebase Cloud Messaging (FCM)


Add Firebase to Android Project

Select Project view in Android Studio and paste the google-services.json file under app folder.

Android Push Notification Using Firebase Cloud Messaging (FCM)

Open project level build.gradle file and add following line under dependencies.

classpath 'com.google.gms:google-services:3.0.0'


Open app level build.gradle file and add following line under dependencies.

compile 'com.google.firebase:firebase-core:9.6.0'


Also add following line at the end of app level build.gradle file.

apply plugin: 'com.google.gms.google-services'


Firebase Cloud Messaging (FCM) Implementation

Create a new class MyFirebaseMessagingService that extends FirebaseMessagingService. Add following code inside it.

package com.firebasepushnotification;

import android.app.NotificationManager;
import android.app.PendingIntent;
import android.content.Context;
import android.content.Intent;
import android.media.RingtoneManager;
import android.net.Uri;
import android.support.v4.app.NotificationCompat;

import com.google.firebase.messaging.FirebaseMessagingService;
import com.google.firebase.messaging.RemoteMessage;

public class MyFirebaseMessagingService extends FirebaseMessagingService {
    @Override
    public void onMessageReceived(RemoteMessage remoteMessage) {
        //calling method to generate push notification
        sendNotification(remoteMessage.getNotification().getBody());
    }

    private void sendNotification(String messageBody) {
        Intent intent = new Intent(this, MainActivity.class);
        intent.addFlags(Intent.FLAG_ACTIVITY_CLEAR_TOP);
        PendingIntent pendingIntent = PendingIntent.getActivity(this, 0, intent,
                PendingIntent.FLAG_ONE_SHOT);

        Uri defaultSoundUri= RingtoneManager.getDefaultUri(RingtoneManager.TYPE_NOTIFICATION);
        NotificationCompat.Builder notificationBuilder = new NotificationCompat.Builder(this)
                .setSmallIcon(R.mipmap.ic_launcher)
                .setContentTitle("Push Notification Example")
                .setContentText(messageBody)
                .setAutoCancel(true)
                .setSound(defaultSoundUri)
                .setContentIntent(pendingIntent);

        NotificationManager notificationManager =
                (NotificationManager) getSystemService(Context.NOTIFICATION_SERVICE);

        notificationManager.notify(0, notificationBuilder.build());
    }
}


Now we have to add above service in AndroidManifest.xml. So add following code anywhere between <application> <application/> tag.

<service
    android:name=".MyFirebaseMessagingService">
    <intent-filter>
        <action android:name="com.google.firebase.MESSAGING_EVENT"/>
    </intent-filter>
</service>


Build and run your app.


Sending Push Notification

Go back to Firebase Console and select Notifications option from left menu. Click on New Message button.

Add a message in Message text box. Choose Target as User Segment. This will send the notification to all the users using this android app. You can also send notification to a particular user’s device.

Choose the app package name from drop down menu. Finally click on Send Message button to send the message.

Android Push Notification Using Firebase Cloud Messaging (FCM)

If you have done everything correctly then you will see a push notification in your device.Android Push Notification Using Firebase Cloud Messaging (FCM)


Comment below if you are facing any problem in above android push notification tutorial.

The post Android Push Notification Using Firebase Cloud Messaging (FCM) appeared first on The Crazy Programmer.

Diamond Problem in Inheritance

$
0
0

Diamond problem occurs when we use multiple inheritance in programming languages like C++ or Java.

Let’s understand this with one example.

Diamond Problem in Inheritance

class A {
	void display()
	{
		//some code
	}
}

class B : public A{
	void display()
	{
		//some code
	}
}

class C : public A{
	void display()
	{
		//some code
	}
}

class D : public B, public C{
	//contains two display() functions
}

Suppose there are four classes A, B, C and D. Class B and C inherit class A. Now class B and C contains one copy of all the functions and data members of class A.

Class D is derived from Class B and C. Now class D contains two copies of all the functions and data members of class A. One copy comes from class B and another copy comes from class C.

Let’s say class A have a function with name display(). So class D have two display() functions as I have explained above. If we call display() function using class D object then ambiguity occurs because compiler gets confused that whether it should call display() that came from class B or from class C. If you will compile above program then it will show error.

Diamond Problem in Inheritance

This kind of problem is called diamond problem as a diamond structure is formed (see the image).

How to Remove Diamond Problem in C++?

We can remove diamond problem by using virtual keyword. It can be done in following way.

class A {
	void display()
	{
		//some code
	}
}

class B : virtual public A{
	void display()
	{
		//some code
	}
}

class C : virtual public A{
	void display()
	{
		//some code
	}
}

class D : public B, public C{
	//contains one display() functions
}

You can see we have marked class B and C as virtual. Now compiler takes care that only one copy of data members and functions of class A comes to class D.

How to Remove Diamond Problem in Java?

To remove this problem java does not support multiple inheritance. Although we can achieve multiple inheritance using interfaces.

Comment below if you found anything missing or incorrect in above diamond problem tutorial.

The post Diamond Problem in Inheritance appeared first on The Crazy Programmer.

Android Convert Image to Base64 String or Base64 String to Image

$
0
0

In this tutorial you will learn how to convert image to base64 string or base64 string to image in android.

Base64 is an encoding schema that represents binary data in an ASCII string. It becomes really helpful in case you want to upload image to server or save the image in database.

How It Works?

Image to Base64 String

  • First convert the image into bitmap.
  • Then compress bitmap to ByteArrayOutputStream.
  • Convert ByteArrayOutputStream to byte array.
  • Finally convert byte array to base64 string.

Base64 String to Image

  • Convert the base64 string to byte array.
  • Now convert byte array to bitmap.


Android Convert Image to Base64 String or Base64 String to Image

Create new android studio project with package name com.base64example.

Add an image in res/drawable folder. This is the image that we will convert. See below screenshot I have added an image with name logo.png.

Android Convert Image to Base64 String or Base64 String to Image

Now add following code in respectively files.

acitivity_main.xml

<?xml version="1.0" encoding="utf-8"?>
<RelativeLayout xmlns:android="http://schemas.android.com/apk/res/android"
    xmlns:tools="http://schemas.android.com/tools"
    android:layout_width="match_parent"
    android:layout_height="match_parent"
    tools:context="com.base64example.MainActivity">

    <ImageView
        android:layout_width="match_parent"
        android:layout_height="wrap_content"
        android:id="@+id/image"/>
</RelativeLayout>


MainActivity.java

package com.base64example;

import android.graphics.Bitmap;
import android.graphics.BitmapFactory;
import android.support.v7.app.AppCompatActivity;
import android.os.Bundle;
import android.util.Base64;
import android.widget.ImageView;

import java.io.ByteArrayOutputStream;

public class MainActivity extends AppCompatActivity {

    @Override
    protected void onCreate(Bundle savedInstanceState) {
        super.onCreate(savedInstanceState);
        setContentView(R.layout.activity_main);

        ImageView image =(ImageView)findViewById(R.id.image);

        //encode image to base64 string
        ByteArrayOutputStream baos = new ByteArrayOutputStream();
        Bitmap bitmap = BitmapFactory.decodeResource(getResources(), R.drawable.logo);
        bitmap.compress(Bitmap.CompressFormat.JPEG, 100, baos);
        byte[] imageBytes = baos.toByteArray();
        String imageString = Base64.encodeToString(imageBytes, Base64.DEFAULT);

        //decode base64 string to image
        imageBytes = Base64.decode(imageString, Base64.DEFAULT);
        Bitmap decodedImage = BitmapFactory.decodeByteArray(imageBytes, 0, imageBytes.length);
        image.setImageBitmap(decodedImage);
    }
}

Run the project.

I am converting the image to base64 string and then converting back to bitmap and finally showing it in ImageView.


Screenshot

Android Convert Image to Base64 String or Base64 String to Image

The post Android Convert Image to Base64 String or Base64 String to Image appeared first on The Crazy Programmer.


Android Round Button Example

$
0
0

In this tutorial you will learn how to create a round button in android.

Shape drawable resource is used to define shape of a view. Below I have shared an example to to make a circle button.

Android Round Button Example

Create a xml file inside res/drawable folder.

round_button.xml

<?xml version="1.0" encoding="utf-8"?>
<shape xmlns:android="http://schemas.android.com/apk/res/android"
    android:shape="oval">
    <stroke
        android:color="#FF6F00"
        android:width="3dip"/>
    <solid android:color="#FFC107"/>
    <size android:width="100dp" android:height="100dp"/>
</shape>


shape: Defines shape of view. It can be rectangle, oval, line and ring. In this case we are using oval shape to make the button circular.

stroke: Defines boundary of shape.

solid: Defines background color of shape.

size: Defines size of shape.


Now set this xml as background of the button.

<Button
        android:layout_width="wrap_content"
        android:layout_height="wrap_content"
        android:text="Button"
        android:background="@drawable/round_button"/>

The button will look like:

Android Round Button Example

You can customize its color and size according to your need.

The post Android Round Button Example appeared first on The Crazy Programmer.

Android Date Picker Example

$
0
0

In this tutorial you will get android date picker example.

DatePickerDialog is used to show a dialog to pick a date. To show a DatePickerDialog call showDialog() with unique DatePickerDialog id.

onCreateDialog() method is automatically called on calling showDialog() method.

Register OnDateSetListener with DatePickerDialog and override onDateSet() method.

onDateSet() contains the picked date. I am setting the picked date in textview using displayDate() method.

Calendar class is used to get current date.


Android Date Picker Example

Create a new android studio project with package name com.datepickerexample.

Create a layout file inside res/layout folder and add following code inside it.

activity_main.xml

<?xml version="1.0" encoding="utf-8"?>
<LinearLayout xmlns:android="http://schemas.android.com/apk/res/android"
    xmlns:tools="http://schemas.android.com/tools"
    android:layout_width="match_parent"
    android:layout_height="match_parent"
    android:paddingBottom="15dp"
    android:paddingLeft="15dp"
    android:paddingRight="15dp"
    android:paddingTop="15dp"
    tools:context="com.datepickerexample.MainActivity"
    android:orientation="vertical"
    android:gravity="center">

    <Button
        android:layout_width="match_parent"
        android:layout_height="wrap_content"
        android:text="Set Date"
        android:id="@+id/setDateBtn"
        android:layout_marginBottom="10dp"/>

    <TextView
        android:layout_width="match_parent"
        android:layout_height="wrap_content"
        android:id="@+id/selectedDateTxt"/>
</LinearLayout>


Create a java source file inside package and add following code.

MainActivity.java

package com.datepickerexample;

import android.app.DatePickerDialog;
import android.app.Dialog;
import android.support.v7.app.AppCompatActivity;
import android.os.Bundle;
import android.view.View;
import android.widget.Button;
import android.widget.DatePicker;
import android.widget.TextView;
import java.util.Calendar;

public class MainActivity extends AppCompatActivity {
    Button setDateBtn;
    TextView selectedDateTxt;
    int day, month, year;

    @Override
    protected void onCreate(Bundle savedInstanceState) {
        super.onCreate(savedInstanceState);
        setContentView(R.layout.activity_main);

        setDateBtn = (Button)findViewById(R.id.setDateBtn);
        selectedDateTxt = (TextView)findViewById(R.id.selectedDateTxt);

        //get current date
        Calendar c = Calendar.getInstance();
        day = c.get(Calendar.DAY_OF_MONTH);
        month = c.get(Calendar.MONTH);
        year = c.get(Calendar.YEAR);

        //set date in textview
        displayDate(day, month, year);

        setDateBtn.setOnClickListener(new View.OnClickListener() {
            @Override
            public void onClick(View v) {
                showDialog(111);
            }
        });
    }

    void displayDate(int d, int m, int y){
        selectedDateTxt.setText("Date: " + d +"/" + m +"/" + y);
    }

    @Override
    protected Dialog onCreateDialog(int id) {
        if (id == 111) {
            return new DatePickerDialog(this, dateLPickerListener, year, month, day);
        }
        return null;
    }

    private DatePickerDialog.OnDateSetListener dateLPickerListener = new DatePickerDialog.OnDateSetListener() {
        @Override
        public void onDateSet(DatePicker arg0, int y, int m, int d) {
            displayDate(d, m+1, y);
        }
    };
}


Screenshots

Android Date Picker Example

Android Date Picker Example

Comment below if you are facing any problem in above android date picker example.

The post Android Date Picker Example appeared first on The Crazy Programmer.

4 Ways to Get Current Date in Android

$
0
0

In this tutorial I will show you 4 different ways to get current date in android.

For doing this we will use Calendar, Date, SimpleDateFormate and System class.

How to Get Current Date in Android?

Method 1:

In this method we will use Calendar and SimpleDateFormate class.

SimpleDateFormat sdf = new SimpleDateFormat("dd/MM/yyyy");
Calendar c = Calendar.getInstance();
String date = sdf.format(c.getTime());


Method 2:

We can use Calendar class to get current date in another way.

Calendar c = Calendar.getInstance();
int day = c.get(Calendar.DAY_OF_MONTH);
int month = c.get(Calendar.MONTH);
int year = c.get(Calendar.YEAR);
String date = day + "/" + (month+1) + "/" + year;


Method 3:

In this method we will use Date and SimpleDateFormate class.

SimpleDateFormat sdf = new SimpleDateFormat("dd/MM/yyyy");
String date = sdf.format(new Date());


Method 4:

Another method in which we will use System and SimpleDateFormate class to get current date

SimpleDateFormat sdf = new SimpleDateFormat("dd/MM/yyyy");
String date = sdf.format(System.currentTimeMillis());


Comment below if you know any other way to get current date in android.

The post 4 Ways to Get Current Date in Android appeared first on The Crazy Programmer.

Android Real Time Chat Application Using Firebase Tutorial

$
0
0

In this tutorial you will learn to build an android real time chat application using firebase database.

Before reading this tutorial I hope you are already familiar with basic read and write operations on firebase. If you don’t know then I would recommend you to follow below link to get basic overview about firebase.

Read: https://firebase.google.com/docs/database/android/start/

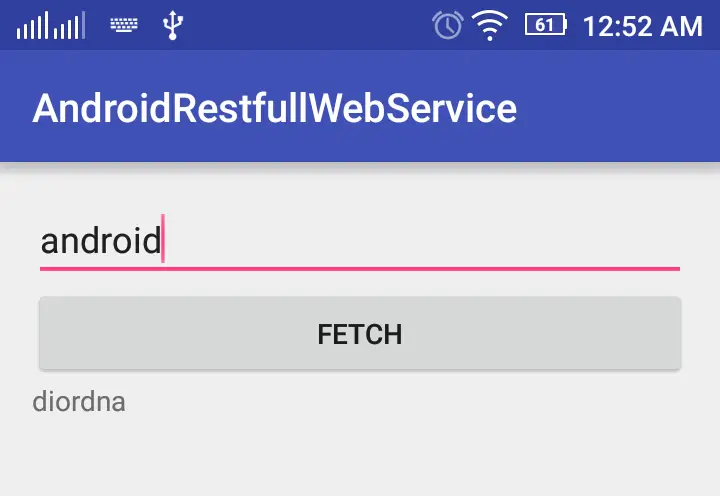
I have developed a very basic and simple chat app in which user can login and register in the system and can do one to one chat with other users.

Android Real Time Chat Application Using Firebase Tutorial 1

Video Demo

Watch below video to see how the app works.

Android Real Time Chat Application Using Firebase Tutorial

Firebase

Go to firebase console and create a new project.

Link: https://console.firebase.google.com/

Select Database option in left sidebar. The database structure used in this project looks as shown in below image.

Android Real Time Chat Application Using Firebase Tutorial 2

In my case the database base url is https://android-chat-app-e711d.firebaseio.com/. It will be different in your case so make sure to change the url wherever used in the code.

Android Studio

Create a new android studio project with package name com.androidchatapp

Now add dependency for firebase database and volley in build.gradle (Module: app) file. Add following lines under dependency section and sync the project.

compile 'com.firebase:firebase-client-android:2.5.2+'
compile 'com.android.volley:volley:1.0.0'

Add internet access permission in AndroidManifest.xml file.

<uses-permission android:name="android.permission.INTERNET" />

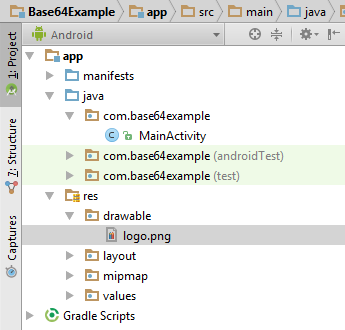
The android studio project has following structure.

Android Real Time Chat Application Using Firebase Tutorial 3

Add following code in respective files.

AndroidManifest.xml

<?xml version="1.0" encoding="utf-8"?>
<manifest xmlns:android="http://schemas.android.com/apk/res/android"
    package="com.androidchatapp">

    <uses-permission android:name="android.permission.INTERNET" />

    <application
        android:allowBackup="true"
        android:icon="@mipmap/ic_launcher"
        android:label="@string/app_name"
        android:supportsRtl="true"
        android:theme="@style/AppTheme">
        <activity android:name=".Login">
            <intent-filter>
                <action android:name="android.intent.action.MAIN" />

                <category android:name="android.intent.category.LAUNCHER" />
            </intent-filter>
        </activity>
        <activity android:name=".Register" />
        <activity android:name=".Users" />
        <activity android:name=".Chat" />
    </application>

</manifest>

rounded_corner1.xml

<?xml version="1.0" encoding="utf-8"?>
<shape xmlns:android="http://schemas.android.com/apk/res/android">
    <solid android:color="#dddddd" />
    <stroke
        android:width="0dip"
        android:color="#dddddd" />
    <corners android:radius="10dip" />
    <padding
        android:bottom="5dip"
        android:left="5dip"
        android:right="5dip"
        android:top="5dip" />
</shape>

rounded_corner2.xml

<?xml version="1.0" encoding="utf-8"?>
<shape xmlns:android="http://schemas.android.com/apk/res/android">
    <solid android:color="#f0f0f0" />
    <stroke
        android:width="0dip"
        android:color="#f0f0f0" />
    <corners android:radius="10dip" />
    <padding
        android:bottom="5dip"
        android:left="5dip"
        android:right="5dip"
        android:top="5dip" />
</shape>

activity_chat.xml

<?xml version="1.0" encoding="utf-8"?>
<LinearLayout xmlns:android="http://schemas.android.com/apk/res/android"
    xmlns:tools="http://schemas.android.com/tools"
    android:layout_width="match_parent"
    android:layout_height="match_parent"
    android:background="#ffffff"
    android:paddingBottom="@dimen/activity_vertical_margin"
    android:paddingLeft="@dimen/activity_horizontal_margin"
    android:paddingRight="@dimen/activity_horizontal_margin"
    android:paddingTop="@dimen/activity_vertical_margin"
    android:orientation="vertical"
    tools:context="com.androidchatapp.Chat">

    <ScrollView
        android:layout_width="match_parent"
        android:layout_weight="20"
        android:layout_height="wrap_content"
        android:id="@+id/scrollView">

        <LinearLayout
            android:layout_width="match_parent"
            android:layout_height="wrap_content"
            android:orientation="vertical"
            android:id="@+id/layout1">

      </LinearLayout>
    </ScrollView>

    <include
        layout="@layout/message_area"
        android:layout_width="match_parent"
        android:layout_height="wrap_content"
        android:gravity="bottom"
        android:layout_marginTop="5dp"/>
</LinearLayout>

activity_login.xml

<?xml version="1.0" encoding="utf-8"?>
<LinearLayout xmlns:android="http://schemas.android.com/apk/res/android"
    xmlns:tools="http://schemas.android.com/tools"
    android:layout_width="match_parent"
    android:layout_height="match_parent"
    android:paddingBottom="@dimen/activity_vertical_margin"
    android:paddingLeft="@dimen/activity_horizontal_margin"
    android:paddingRight="@dimen/activity_horizontal_margin"
    android:paddingTop="@dimen/activity_vertical_margin"
    tools:context="com.androidchatapp.Login"
    android:orientation="vertical"
    android:gravity="center">

    <TextView
        android:layout_width="match_parent"
        android:layout_height="wrap_content"
        android:text="Login"
        android:textSize="30dp"
        android:gravity="center"
        android:layout_marginBottom="20dp"/>

    <EditText
        android:layout_width="match_parent"
        android:layout_height="wrap_content"
        android:id="@+id/username"
        android:inputType="text"
        android:maxLines="1"
        android:hint="enter username"
        android:layout_marginBottom="10dp"/>

    <EditText
        android:layout_width="match_parent"
        android:layout_height="wrap_content"
        android:id="@+id/password"
        android:inputType="textPassword"
        android:maxLines="1"
        android:hint="enter password"
        android:layout_marginBottom="10dp"/>

    <Button
        android:layout_width="match_parent"
        android:layout_height="wrap_content"
        android:text="Login"
        android:id="@+id/loginButton"
        android:layout_marginBottom="20dp"/>

    <TextView
        android:layout_width="match_parent"
        android:layout_height="wrap_content"
        android:text="Click here to register"
        android:textSize="20dp"
        android:gravity="center"
        android:id="@+id/register"/>

</LinearLayout>

activity_register.xml

<?xml version="1.0" encoding="utf-8"?>
<LinearLayout xmlns:android="http://schemas.android.com/apk/res/android"
    xmlns:tools="http://schemas.android.com/tools"
    android:layout_width="match_parent"
    android:layout_height="match_parent"
    android:paddingBottom="@dimen/activity_vertical_margin"
    android:paddingLeft="@dimen/activity_horizontal_margin"
    android:paddingRight="@dimen/activity_horizontal_margin"
    android:paddingTop="@dimen/activity_vertical_margin"
    tools:context="com.androidchatapp.Register"
    android:orientation="vertical"
    android:gravity="center">

    <TextView
        android:layout_width="match_parent"
        android:layout_height="wrap_content"
        android:text="Register"
        android:textSize="30dp"
        android:gravity="center"
        android:layout_marginBottom="20dp"/>

    <EditText
        android:layout_width="match_parent"
        android:layout_height="wrap_content"
        android:id="@+id/username"
        android:inputType="text"
        android:maxLines="1"
        android:hint="enter username"
        android:layout_marginBottom="10dp"/>

    <EditText
        android:layout_width="match_parent"
        android:layout_height="wrap_content"
        android:id="@+id/password"
        android:inputType="textPassword"
        android:maxLines="1"
        android:hint="enter password"
        android:layout_marginBottom="10dp"/>

    <Button
        android:layout_width="match_parent"
        android:layout_height="wrap_content"
        android:text="Register"
        android:id="@+id/registerButton"
        android:layout_marginBottom="20dp"/>

    <TextView
        android:layout_width="match_parent"
        android:layout_height="wrap_content"
        android:text="Click here to login"
        android:textSize="20dp"
        android:gravity="center"
        android:id="@+id/login"/>

</LinearLayout>

activity_users.xml

<?xml version="1.0" encoding="utf-8"?>
<LinearLayout xmlns:android="http://schemas.android.com/apk/res/android"
    xmlns:tools="http://schemas.android.com/tools"
    android:layout_width="match_parent"
    android:layout_height="match_parent"
    android:paddingBottom="@dimen/activity_vertical_margin"
    android:paddingLeft="@dimen/activity_horizontal_margin"
    android:paddingRight="@dimen/activity_horizontal_margin"
    android:paddingTop="@dimen/activity_vertical_margin"
    tools:context="com.androidchatapp.Users"
    android:orientation="vertical">

    <TextView
        android:layout_width="match_parent"
        android:layout_height="wrap_content"
        android:text="No users found!"
        android:id="@+id/noUsersText"
        android:visibility="gone"/>

    <ListView
        android:layout_width="match_parent"
        android:layout_height="wrap_content"
        android:id="@+id/usersList"/>
</LinearLayout>

message_area.xml

<?xml version="1.0" encoding="utf-8"?>
<LinearLayout xmlns:android="http://schemas.android.com/apk/res/android"
    android:layout_width="match_parent"
    android:layout_height="match_parent"
    android:background="@color/colorPrimaryDark"
    android:gravity="bottom"
    android:orientation="horizontal">

    <EditText
        android:layout_width="match_parent"
        android:layout_height="wrap_content"
        android:layout_weight="1"
        android:textColorHint="#CFD8DC"
        android:textColor="#CFD8DC"
        android:hint="Write a message..."
        android:id="@+id/messageArea"
        android:maxHeight="80dp"
        />

    <ImageView
        android:layout_width="match_parent"
        android:layout_height="wrap_content"
        android:layout_weight="4"
        android:padding="4dp"
        android:src="@android:drawable/ic_menu_send"
        android:id="@+id/sendButton"/>
</LinearLayout>

Chat.java

package com.androidchatapp;

import android.support.v7.app.AppCompatActivity;
import android.os.Bundle;
import android.view.View;
import android.view.ViewGroup;
import android.widget.EditText;
import android.widget.ImageView;
import android.widget.LinearLayout;
import android.widget.ScrollView;
import android.widget.TextView;

import com.firebase.client.ChildEventListener;
import com.firebase.client.DataSnapshot;
import com.firebase.client.Firebase;
import com.firebase.client.FirebaseError;

import java.util.HashMap;
import java.util.Map;

public class Chat extends AppCompatActivity {
    LinearLayout layout;
    ImageView sendButton;
    EditText messageArea;
    ScrollView scrollView;
    Firebase reference1, reference2;

    @Override
    protected void onCreate(Bundle savedInstanceState) {
        super.onCreate(savedInstanceState);
        setContentView(R.layout.activity_chat);

        layout = (LinearLayout)findViewById(R.id.layout1);
        sendButton = (ImageView)findViewById(R.id.sendButton);
        messageArea = (EditText)findViewById(R.id.messageArea);
        scrollView = (ScrollView)findViewById(R.id.scrollView);

        Firebase.setAndroidContext(this);
        reference1 = new Firebase("https://android-chat-app-e711d.firebaseio.com/messages/" + UserDetails.username + "_" + UserDetails.chatWith);
        reference2 = new Firebase("https://android-chat-app-e711d.firebaseio.com/messages/" + UserDetails.chatWith + "_" + UserDetails.username);

        sendButton.setOnClickListener(new View.OnClickListener() {
            @Override
            public void onClick(View v) {
                String messageText = messageArea.getText().toString();

                if(!messageText.equals("")){
                    Map<String, String> map = new HashMap<String, String>();
                    map.put("message", messageText);
                    map.put("user", UserDetails.username);
                    reference1.push().setValue(map);
                    reference2.push().setValue(map);
                }
            }
        });

        reference1.addChildEventListener(new ChildEventListener() {
            @Override
            public void onChildAdded(DataSnapshot dataSnapshot, String s) {
                Map map = dataSnapshot.getValue(Map.class);
                String message = map.get("message").toString();
                String userName = map.get("user").toString();

                if(userName.equals(UserDetails.username)){
                    addMessageBox("You:-\n" + message, 1);
                }
                else{
                    addMessageBox(UserDetails.chatWith + ":-\n" + message, 2);
                }
            }

            @Override
            public void onChildChanged(DataSnapshot dataSnapshot, String s) {

            }

            @Override
            public void onChildRemoved(DataSnapshot dataSnapshot) {

            }

            @Override
            public void onChildMoved(DataSnapshot dataSnapshot, String s) {

            }

            @Override
            public void onCancelled(FirebaseError firebaseError) {

            }
        });
    }

    public void addMessageBox(String message, int type){
        TextView textView = new TextView(Chat.this);
        textView.setText(message);
        LinearLayout.LayoutParams lp = new LinearLayout.LayoutParams(ViewGroup.LayoutParams.MATCH_PARENT, ViewGroup.LayoutParams.WRAP_CONTENT);
        lp.setMargins(0, 0, 0, 10);
        textView.setLayoutParams(lp);

        if(type == 1) {
            textView.setBackgroundResource(R.drawable.rounded_corner1);
        }
        else{
            textView.setBackgroundResource(R.drawable.rounded_corner2);
        }

        layout.addView(textView);
        scrollView.fullScroll(View.FOCUS_DOWN);
    }
}

Login.java

package com.androidchatapp;

import android.app.ProgressDialog;
import android.content.Intent;
import android.support.v7.app.AppCompatActivity;
import android.os.Bundle;
import android.view.View;
import android.widget.Button;
import android.widget.EditText;
import android.widget.TextView;
import android.widget.Toast;

import com.android.volley.Request;
import com.android.volley.RequestQueue;
import com.android.volley.Response;
import com.android.volley.VolleyError;
import com.android.volley.toolbox.StringRequest;
import com.android.volley.toolbox.Volley;

import org.json.JSONException;
import org.json.JSONObject;

public class Login extends AppCompatActivity {
    TextView register;
    EditText username, password;
    Button loginButton;
    String user, pass;

    @Override
    protected void onCreate(Bundle savedInstanceState) {
        super.onCreate(savedInstanceState);
        setContentView(R.layout.activity_login);

        register = (TextView)findViewById(R.id.register);
        username = (EditText)findViewById(R.id.username);
        password = (EditText)findViewById(R.id.password);
        loginButton = (Button)findViewById(R.id.loginButton);

        register.setOnClickListener(new View.OnClickListener() {
            @Override
            public void onClick(View v) {
                startActivity(new Intent(Login.this, Register.class));
            }
        });

        loginButton.setOnClickListener(new View.OnClickListener() {
            @Override
            public void onClick(View v) {
                user = username.getText().toString();
                pass = password.getText().toString();

                if(user.equals("")){
                    username.setError("can't be blank");
                }
                else if(pass.equals("")){
                    password.setError("can't be blank");
                }
                else{
                    String url = "https://android-chat-app-e711d.firebaseio.com/users.json";
                    final ProgressDialog pd = new ProgressDialog(Login.this);
                    pd.setMessage("Loading...");
                    pd.show();

                    StringRequest request = new StringRequest(Request.Method.GET, url, new Response.Listener<String>(){
                        @Override
                        public void onResponse(String s) {
                            if(s.equals("null")){
                                Toast.makeText(Login.this, "user not found", Toast.LENGTH_LONG).show();
                            }
                            else{
                                try {
                                    JSONObject obj = new JSONObject(s);

                                    if(!obj.has(user)){
                                        Toast.makeText(Login.this, "user not found", Toast.LENGTH_LONG).show();
                                    }
                                    else if(obj.getJSONObject(user).getString("password").equals(pass)){
                                        UserDetails.username = user;
                                        UserDetails.password = pass;
                                        startActivity(new Intent(Login.this, Users.class));
                                    }
                                    else {
                                        Toast.makeText(Login.this, "incorrect password", Toast.LENGTH_LONG).show();
                                    }
                                } catch (JSONException e) {
                                    e.printStackTrace();
                                }
                            }

                            pd.dismiss();
                        }
                    },new Response.ErrorListener(){
                        @Override
                        public void onErrorResponse(VolleyError volleyError) {
                            System.out.println("" + volleyError);
                            pd.dismiss();
                        }
                    });

                    RequestQueue rQueue = Volley.newRequestQueue(Login.this);
                    rQueue.add(request);
                }

            }
        });
    }
}

Register.java

package com.androidchatapp;

import android.app.ProgressDialog;
import android.content.Intent;
import android.support.v7.app.AppCompatActivity;
import android.os.Bundle;
import android.view.View;
import android.widget.Button;
import android.widget.EditText;
import android.widget.TextView;
import android.widget.Toast;

import com.android.volley.Request;
import com.android.volley.RequestQueue;
import com.android.volley.Response;
import com.android.volley.VolleyError;
import com.android.volley.toolbox.StringRequest;
import com.android.volley.toolbox.Volley;
import com.firebase.client.Firebase;

import org.json.JSONException;
import org.json.JSONObject;

public class Register extends AppCompatActivity {
    EditText username, password;
    Button registerButton;
    String user, pass;
    TextView login;

    @Override
    protected void onCreate(Bundle savedInstanceState) {
        super.onCreate(savedInstanceState);
        setContentView(R.layout.activity_register);

        username = (EditText)findViewById(R.id.username);
        password = (EditText)findViewById(R.id.password);
        registerButton = (Button)findViewById(R.id.registerButton);
        login = (TextView)findViewById(R.id.login);

        Firebase.setAndroidContext(this);

        login.setOnClickListener(new View.OnClickListener() {
            @Override
            public void onClick(View v) {
                startActivity(new Intent(Register.this, Login.class));
            }
        });

        registerButton.setOnClickListener(new View.OnClickListener() {
            @Override
            public void onClick(View v) {
                user = username.getText().toString();
                pass = password.getText().toString();

                if(user.equals("")){
                    username.setError("can't be blank");
                }
                else if(pass.equals("")){
                        password.setError("can't be blank");
                    }
                    else if(!user.matches("[A-Za-z0-9]+")){
                            username.setError("only alphabet or number allowed");
                        }
                        else if(user.length()<5){
                                username.setError("at least 5 characters long");
                            }
                            else if(pass.length()<5){
                                password.setError("at least 5 characters long");
                            }
                            else {
                                final ProgressDialog pd = new ProgressDialog(Register.this);
                                pd.setMessage("Loading...");
                                pd.show();

                                String url = "https://android-chat-app-e711d.firebaseio.com/users.json";

                                StringRequest request = new StringRequest(Request.Method.GET, url, new Response.Listener<String>(){
                                    @Override
                                    public void onResponse(String s) {
                                        Firebase reference = new Firebase("https://android-chat-app-e711d.firebaseio.com/users");

                                        if(s.equals("null")) {
                                            reference.child(user).child("password").setValue(pass);
                                            Toast.makeText(Register.this, "registration successful", Toast.LENGTH_LONG).show();
                                        }
                                        else {
                                            try {
                                                JSONObject obj = new JSONObject(s);

                                                if (!obj.has(user)) {
                                                    reference.child(user).child("password").setValue(pass);
                                                    Toast.makeText(Register.this, "registration successful", Toast.LENGTH_LONG).show();
                                                } else {
                                                    Toast.makeText(Register.this, "username already exists", Toast.LENGTH_LONG).show();
                                                }

                                            } catch (JSONException e) {
                                                    e.printStackTrace();
                                            }
                                        }

                                        pd.dismiss();
                                    }

                                },new Response.ErrorListener(){
                                    @Override
                                    public void onErrorResponse(VolleyError volleyError) {
                                        System.out.println("" + volleyError );
                                        pd.dismiss();
                                    }
                                });

                                RequestQueue rQueue = Volley.newRequestQueue(Register.this);
                                rQueue.add(request);
                            }
            }
        });
    }
}

UserDetails.java

package com.androidchatapp;

public class UserDetails {
    static String username = "";
    static String password = "";
    static String chatWith = "";
}

Users.java

package com.androidchatapp;

import android.app.ProgressDialog;
import android.content.Intent;
import android.support.v7.app.AppCompatActivity;
import android.os.Bundle;
import android.view.View;
import android.widget.AdapterView;
import android.widget.ArrayAdapter;
import android.widget.ListView;
import android.widget.TextView;

import com.android.volley.Request;
import com.android.volley.RequestQueue;
import com.android.volley.Response;
import com.android.volley.VolleyError;
import com.android.volley.toolbox.StringRequest;
import com.android.volley.toolbox.Volley;

import org.json.JSONException;
import org.json.JSONObject;

import java.util.ArrayList;
import java.util.Iterator;

public class Users extends AppCompatActivity {
    ListView usersList;
    TextView noUsersText;
    ArrayList<String> al = new ArrayList<>();
    int totalUsers = 0;
    ProgressDialog pd;

    @Override
    protected void onCreate(Bundle savedInstanceState) {
        super.onCreate(savedInstanceState);
        setContentView(R.layout.activity_users);

        usersList = (ListView)findViewById(R.id.usersList);
        noUsersText = (TextView)findViewById(R.id.noUsersText);

        pd = new ProgressDialog(Users.this);
        pd.setMessage("Loading...");
        pd.show();

        String url = "https://android-chat-app-e711d.firebaseio.com/users.json";

        StringRequest request = new StringRequest(Request.Method.GET, url, new Response.Listener<String>(){
            @Override
            public void onResponse(String s) {
                doOnSuccess(s);
            }
        },new Response.ErrorListener(){
            @Override
            public void onErrorResponse(VolleyError volleyError) {
                System.out.println("" + volleyError);
            }
        });

        RequestQueue rQueue = Volley.newRequestQueue(Users.this);
        rQueue.add(request);

        usersList.setOnItemClickListener(new AdapterView.OnItemClickListener() {
            @Override
            public void onItemClick(AdapterView<?> parent, View view, int position, long id) {
                UserDetails.chatWith = al.get(position);
                startActivity(new Intent(Users.this, Chat.class));
            }
        });
    }

    public void doOnSuccess(String s){
        try {
            JSONObject obj = new JSONObject(s);

            Iterator i = obj.keys();
            String key = "";

            while(i.hasNext()){
                key = i.next().toString();

                if(!key.equals(UserDetails.username)) {
                    al.add(key);
                }

                totalUsers++;
            }

        } catch (JSONException e) {
            e.printStackTrace();
        }

        if(totalUsers <=1){
            noUsersText.setVisibility(View.VISIBLE);
            usersList.setVisibility(View.GONE);
        }
        else{
            noUsersText.setVisibility(View.GONE);
            usersList.setVisibility(View.VISIBLE);
            usersList.setAdapter(new ArrayAdapter<String>(this, android.R.layout.simple_list_item_1, al));
        }

        pd.dismiss();
    }
}


Screenshots

Android Real Time Chat Application Using Firebase Tutorial 4 Android Real Time Chat Application Using Firebase Tutorial 5

Android Real Time Chat Application Using Firebase Tutorial 6 Android Real Time Chat Application Using Firebase Tutorial 7

You can download the apk and source code from below link.

Apk: http://www.mediafire.com/file/jwurkc69pag2u6w/Android+Chat+App_V1.0.apk

Source Code: http://www.mediafire.com/file/djl5s58sbw5kpma/AndroidChatApp.rar 

Feel free to ask your queries by commenting below.

The post Android Real Time Chat Application Using Firebase Tutorial appeared first on The Crazy Programmer.

Android AdMob Tutorial

$
0
0

This is android admob tutorial.

AdMob is an ad network by Google that allows to monetize mobile apps. In this tutorial I will guide you to integrate admob in android app.

Here you will learn about two types of ads.

Banner Ad: It occupies a small portion of activity.

Interstitial Ad: Occupies full screen. Generally shown while moving from one activity to another.

Android AdMob Tutorial

AdMob Console

Go to https://apps.admob.com and login with your google account.

Now go to Monetize and click on Monetize New App button.

Enter name of app and then create a banner and an interstitial ad unit. You will get id for each ad unit. Just keep it somewhere, we will require it later.

Android AdMob Tutorial 1

Android Project

Create a new android studio project with package name com.admobexample

We have to add dependency for google admob ads. Just add following line of code in build.gradle file under dependency section. Sync the project.

compile 'com.google.android.gms:play-services-ads:8.4.0'

Add internet access permission in AndroidManifest.xml file.

<uses-permission android:name="android.permission.INTERNET" />

1. Banner Ad

For banner ad we have to use <com.google.android.gms.ads.AdView> widget in layout xml.

<com.google.android.gms.ads.AdView
        android:layout_width="match_parent"
        android:layout_height="wrap_content"
        android:id="@+id/ad1"
        ads:adSize="BANNER"
        ads:adUnitId="ca-app-pub-9638594751160880/2769913487"/>

Just replace the ad unit id with your banner ad unit id. Make sure the root layout element contains following attribute.

xmlns:ads="http://schemas.android.com/apk/res-auto"

In our activity we have to create an instance of AdRequest and then load it in AdView.

2. Interstitial Ad

For interstitial ad we don’t have to use any widget in layout xml. First make an instance of AdRequest and InterstitialAd. Set ad unit id for interstitial ad and then load the AdRequest inside InterstitialAd. We will add a listener to InterstitialAd instance and show the ad only when it is fully loaded.

Note: When you use a newly created ad unit then it will take some time to start showing ads. Instead of showing live ads you can show test ads. Just read the test ad section at the end of this tutorial.

Add following code in respective files.

activity_main.xml

<?xml version="1.0" encoding="utf-8"?>
<RelativeLayout xmlns:android="http://schemas.android.com/apk/res/android"
    xmlns:tools="http://schemas.android.com/tools"
    xmlns:ads="http://schemas.android.com/apk/res-auto"
    android:layout_width="match_parent"
    android:layout_height="match_parent"
    android:paddingBottom="@dimen/activity_vertical_margin"
    android:paddingLeft="@dimen/activity_horizontal_margin"
    android:paddingRight="@dimen/activity_horizontal_margin"
    android:paddingTop="@dimen/activity_vertical_margin"
    tools:context="com.admobexample.MainActivity">

    <com.google.android.gms.ads.AdView
        android:layout_width="match_parent"
        android:layout_height="wrap_content"
        android:id="@+id/ad1"
        ads:adSize="BANNER"
        ads:adUnitId="ca-app-pub-9638594751160880/2769913486"/>

    <Button
        android:layout_width="wrap_content"
        android:layout_height="wrap_content"
        android:text="Open Interstitial Ad"
        android:layout_centerInParent="true"
        android:id="@+id/button1"/>


</RelativeLayout>

MainActivity.java

package com.admobexample;

import android.support.v7.app.AppCompatActivity;
import android.os.Bundle;
import android.view.View;
import android.widget.Button;

import com.google.android.gms.ads.AdListener;
import com.google.android.gms.ads.AdRequest;
import com.google.android.gms.ads.AdView;
import com.google.android.gms.ads.InterstitialAd;

public class MainActivity extends AppCompatActivity {
    AdView ad1;
    Button button1;
    InterstitialAd iad;

    @Override
    protected void onCreate(Bundle savedInstanceState) {
        super.onCreate(savedInstanceState);
        setContentView(R.layout.activity_main);

        button1 =(Button)findViewById(R.id.button1);
        ad1 = (AdView)findViewById(R.id.ad1);

        //banner ad
        AdRequest request = new AdRequest.Builder().build();
        ad1.loadAd(request);

        //interstitial ad
        button1.setOnClickListener(new View.OnClickListener() {
            @Override
            public void onClick(View v) {
                iad = new InterstitialAd(MainActivity.this);
                AdRequest request = new AdRequest.Builder().build();
                iad.setAdUnitId("ca-app-pub-9638594751160880/5583779080");  //replace ad unit id with yours
                iad.loadAd(request);

                iad.setAdListener(new AdListener() {
                    @Override
                    public void onAdLoaded() {
                        //show interstitial ad when it is fully loaded
                        if(iad.isLoaded()){
                            iad.show();
                        }
                    }
                });
            }
        });
    }
}

Finally run the app.

The banner ad will be displayed automatically when activity is launched but interstitial ad will be displayed on button click.

Screenshots

Android AdMob Tutorial 2

How to show test ads?

AdMod doesn’t allows you to click on ads yourself. It may be possible that you will accidently click on ads. So in that case your account can be banned. To remain on safer side use test ads while you are developing the app.

You can find following line of code in andorid logcat when you will run the app.

Use AdRequest.Builder.addTestDevice(“BB93E7FC72412E6AF38CD7317F5DA20C”) to get test ads on this device

The string in double quotes is the unique id for the device in which you are running the app. To show test ads just use addTestDevice() method while making AdRequest instance. It can be done in following way.

AdRequest request = new AdRequest.Builder().addTestDevice("BB93E7FC72412E6AF38CD7317F5DA20C").build();

Replace the string in double quotes with the id that you got from your logcat.

When you are making the app live just remove addTestDevice() method to remove test ads and show live ads.

Comment below if you are facing any difficulty in above android admob tutorial.

The post Android AdMob Tutorial appeared first on The Crazy Programmer.

Viewing all 761 articles
Browse latest View live